|
You can now create your own frame designs (based on your own styles and techniques), upload them to the Frame Gallery and make them available to your friends, social networks and the entire Photo Frame Show community!
With the help of your favorite graphics software (i.e. Photoshop, Illustrator, FireWorks, CorelDraw, 3D Studio MAX etc.), you can easily create your own and original frames.
When you download a frame to our Desktop Application, you actually save an LFS file which is the proprietary file format used by the Photo Frame Show application.
The LFS file is not an image file format. However most of its information comes from images you can create. The source file for a frame can be created in any application that produces bitmap or vector graphics as long as this application has the functionality to maintain the frame graphic objects in separate layers or in any form that makes any future update easier (i.e. Photoshop, Illustrator, FireWorks, CorelDraw, 3D Studio MAX etc.).
In this guide we will work in Adobe Photoshop since it is the most appropriate application for the frame creation process.
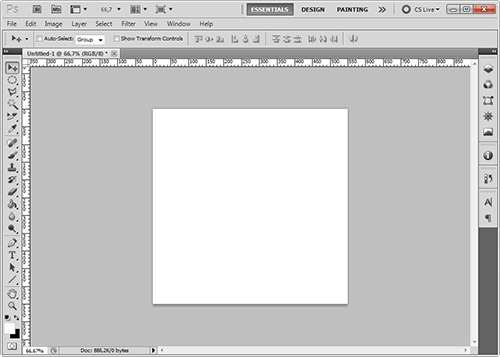
We have to set the canvas for the new psd file at no more than 550x550px. That doesn't mean it has to be a rectangular image but the larger dimension should not exceed 550px in width. For example, it can be 400x550px or 550x500px and so on. This depends on the graphic's orientation (portait or landscape). Of course a perfect circle is an optimal choice while a very wide image will force the frame height to be relatively small.
Then we have to create a NEW LAYER and draw our frame graphic. In this example we create a circle:

Note: ALL selections, fills and any other actions should result in smooth shapes.
Anti-Alias must be always enabled unless the designer wants to create an "imperfect" shape on purpose.
Of course our layer is still empty, so we use a tool (in our case the gradient fill) and ...
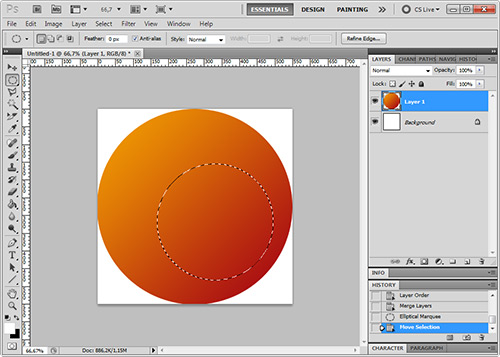
As you can see, we also created a smaller selection over the "sunset" circle. This is the place where a cut will be performed. This is iimportant since the user's photos will be visible through this hole.
We delete the selection to create the photo "placeholder" and we also created a new layer to write some text over the frame graphic:
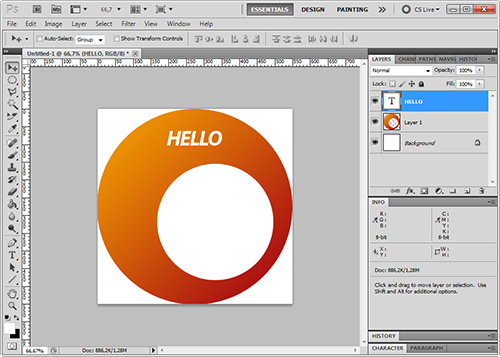
Note: In many cases, text changes may be needed in the future. For this reason, the text layer should be kept editable in the frame source file. Even if a filter or effect requires the text to be rasterized, a copy of it should be stored in a separate layer.
Now, our source file is ready for the next step, the files export.
The files required per FRAME are 2, and since they will be exported from the same source file, they should have the same dimensions:
PNG Artwork File:
Must consist of only 1 layer and should include (or be saved with) transparency. When you "flatten" all layers, the file "background" should be deleted unless the designer wants to include it on purpose.
For Photoshop you can use the File -> Save for Web & Devices command and set the PNG-24 as the selected file format. The "Transparency" option must be enabled.
Filename example: myframe.png (no special characters, accents and spaces are allowed)

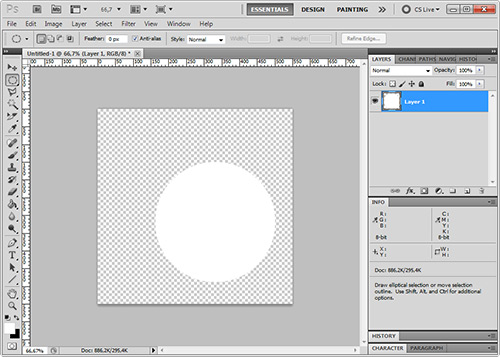
PNG Mask File (also known as "Frame Mask"):
Refers to file where there is only a solid white shape that marks the area where the image/picture used by the Photo Frame Show user will be shown/added. This white area always overlaps the corresponding "photo placeholder" area of the picture/image in the PNG Artwork File.
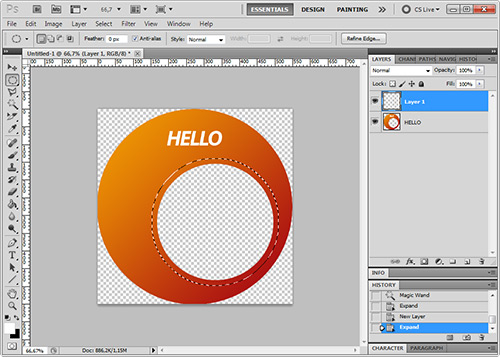
In our example, all we need is just a totally white circle, slightly bigger than the frame's hole. The most usual trick one could use here is to "select" the inner hole (with the magic wand tool or else) and "Expand" the selection for a couple of pixels (5-10 is enough) so the white shape overlaps our artwork.
This is very important because the image inserted in the frame (using the application) must properly blend with the artwork "above".
If the white shape is equal or smaller that the actual artwork "hole" the result will look as if the photo is misplaced photo inside its frame.
In all cases the photo outer edges must be hidden at the time of use and the only way to do it is behind our artwork!
For Photoshop you can use the File -> Save for Web & Devices command and set the PNG-24 as the selected file format. The "Transparency" option must be enabled. Using PNG-24 and "Transparency" is critical because in some cases the photo will be inserted in frames where the artwork will not cover the photo all the way around it and some (if not all) of the photo's edges could be exposed. In this scenario the PNG-24 and "Transparency" will ensure a proper photo crop with anti-alias applied.
Filename example: myframe_mask.png (no special characters, accents and spaces are allowed) - first part of filename should be exactly the same as the PNG Artwork filename.
While the graphic files required per FRAME are 2 there is also 1 text file that you should create.
This file will have information about yourself (enter your "username"), along with the frame category, subcategory and tags suggestions. In case any of the frame artwork element(s) is not originally created by the frame designer, a copyright notice about the element(s) license status should be included. For example, if a license-free brush is used but the original brush designer requires notification, the owner's original artwork location (e.g. URL) should be given.
TXT File:
Refers to plain text file where the information mentioned above, should be included like the example below:
User: pfsuser1
Category: Just to say
Subcategory: Hello
Tags: Circle, Red, Orange, funny, bright, warm
Note: If you think there is no category or subcategory for your frame, then you can just put a name suggestion instead.
Filename example: myframe.txt (no special characters, accents and spaces are allowed) - first part of filename should be exactly the same as the tiff filename.
Finally, just zip these 3 files and submit the ZIP file at support@frameshow.com for review, adaptation and upload of the frame to our Online Frame Gallery.
Important information:
* The frames you send us need to be Copyright free.
* We reserve the right to upload, or not, the frames to the Online Frame Gallery.
|